Visualizing Azure Network Security Groups with Neo4j
During a recent architecture review engagement, I had a bunch of Azure Network Security Groups (NSGs) to review. For those of you who are unfamiliar with NSGs, they are the equivalent of firewall rules in traditional on-premise environment, with one quirk: NSGs are applied on the subnet level. Subnets in Azure are not a security boundary by default. The default configuration in Azure is to permit traffic to flow between subnets within the same VNet. Unless, explicitly overridden by a higher priority rule. Where was I again? oh, NSGs. So, as any techie would do, I embarked to visualize the 50+ ish NSG rules because 1. visualization is cool..2. I work in tech. I will automate stuff whenever I can. So, here I am.
A word on Neo4j and Graph Databases
I had already been aware of Graph databases since my advanced database courses in university. Graph databases are NoSQL databases. They are perfect for visualizing connected objects; A prime example of this is social media networks. They use this all the time. Let us take Twitter as an example. They have users that follow other users. One user (a node) has a relationship (follows) with another user. Using Graph databases enables you to traverse the graph with ease. It becomes easy to identify all users who a specific person follows and all users who commented on a post which are commented on by users who follow other users...you see where this is going. A prime example of Graph databases in cyber is Bloodhound (which uses neo4j under the hood). It visualizes Active directory groups, permissions, and relationships between the various AD objects.
The data
In my assessment, the client sent me a design document that included the current NSGs as part of their internal documentation. Azure's NSGs are applied on the subnet level. NSGs with bad naming conventions make it exponentially harder for analysis. In this case, the client's naming convention game was strong; I was able to figure out which NSGs belonged to which virtual machines just by eyeballing them. Kudos to them, honestly. I ripped the NSGs from the word table in their document, put it into an excel file, and exported the data as CSV, so I could later import it for parsing in neo4j. We could have gone for an alternative approach where we build queries from scratch by extracting the rules using regex and utilizing multi-cursor editing in VS Code to convert them to merge or create Cypher queries, but that was unnecessary and cumbersome. Neo4j has a very convenient import CSV feature. So, I used that after struggling to do it manually (feel free to experiment with that — It is a nice learning experience). For those interested in following along, you can find an oversimplified version of what I worked with and with client details redacted. My dummy data:
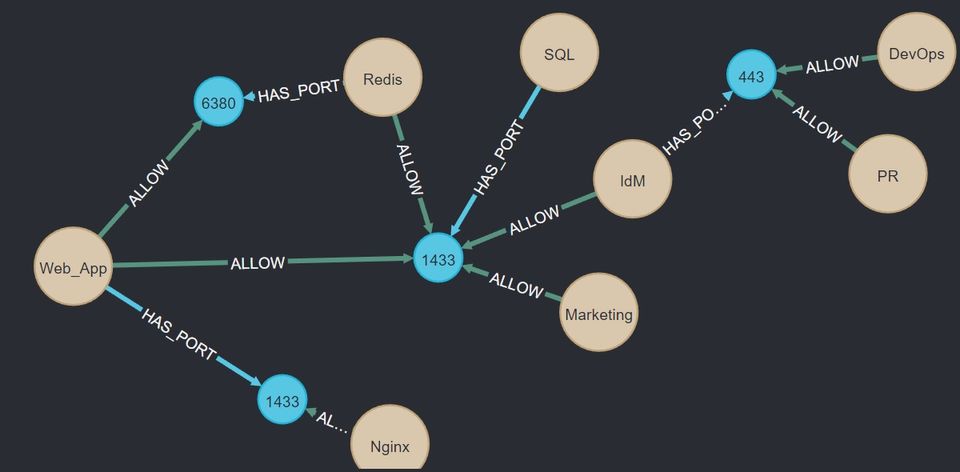
Source,Destination,Destination_Port
Web_App,Redis,6380
Web_App,SQL,1433
Redis,SQL,1433
IdM,SQL,1433
Marketing,SQL,1433
Nginx,Web_App,1433
PR,IdM,443
DevOps,IdM,443
Note that I had issues getting Neo4j to work earlier when my header row included whitespaces. Thus, I replaced all whitespaces with underscores.
Setting up the environment
I used Neo4j's desktop application (community edition). As of the time of this blog post, you can download it from: https://neo4j.com/download/.
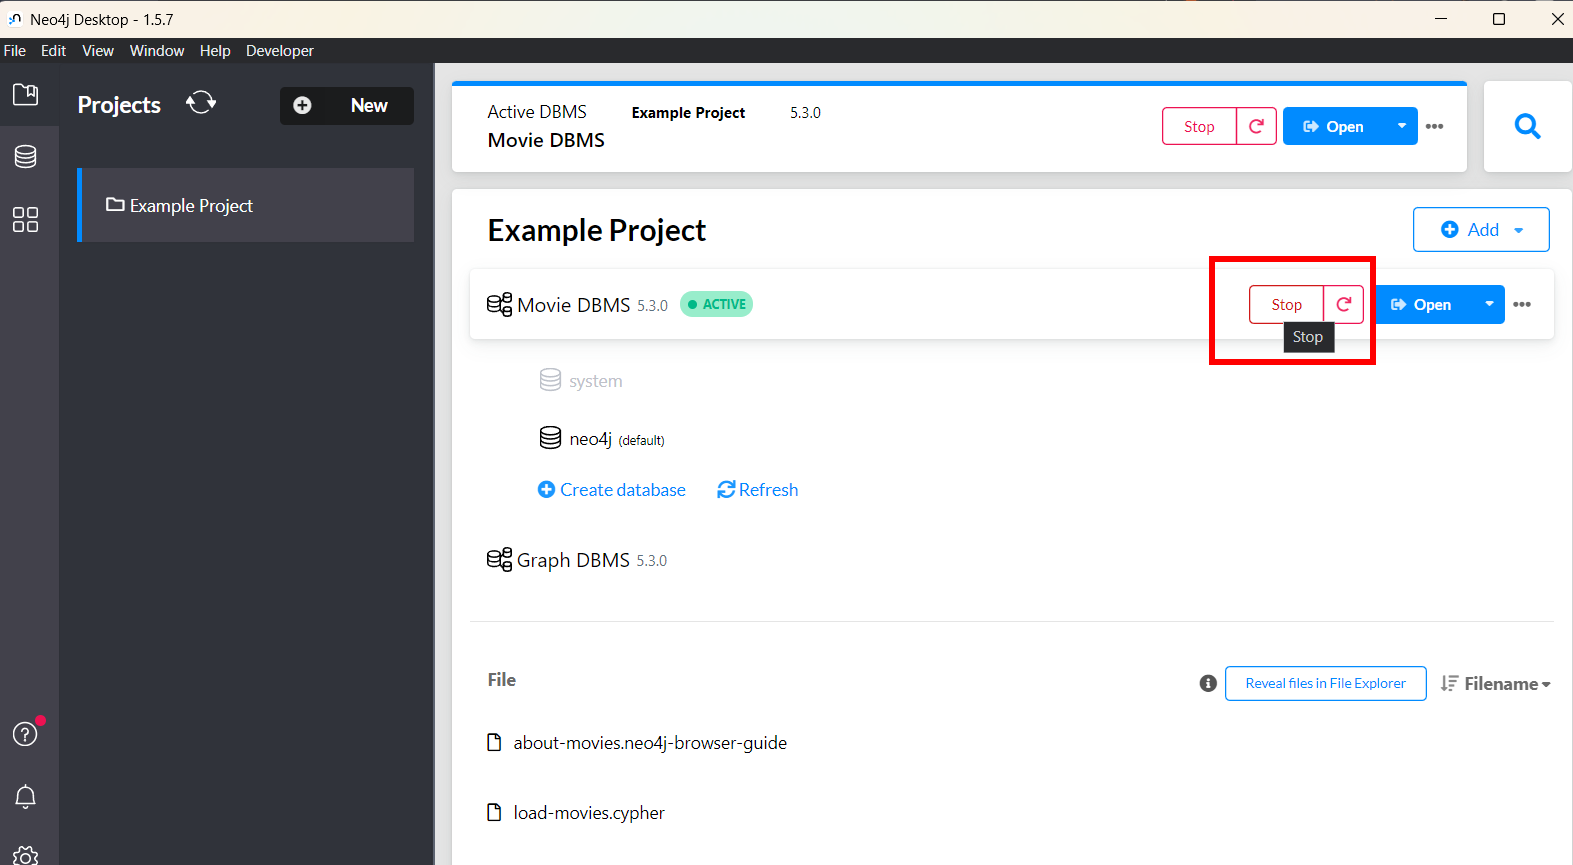
- Install neo4j and stop the default project.
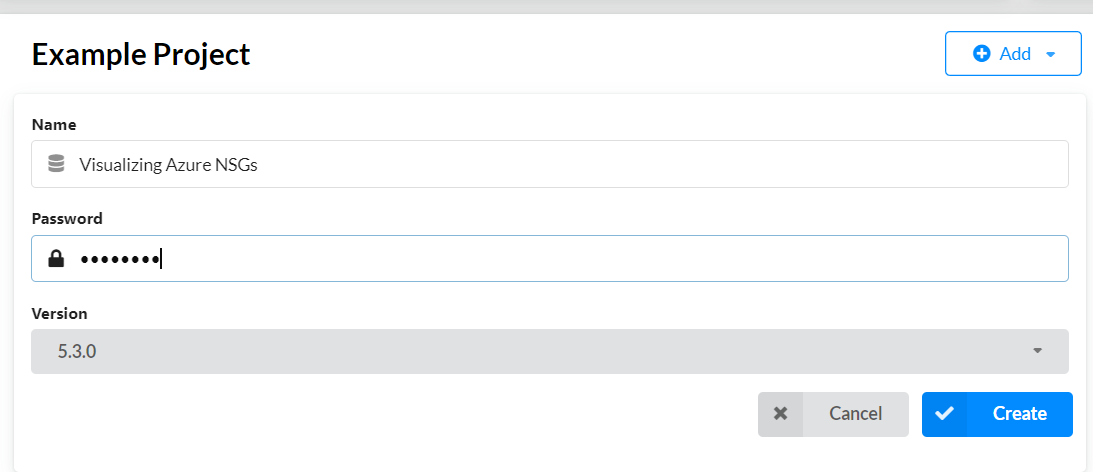
2. Create a new project by clicking the add button, then click on local DBMS to create a new database.
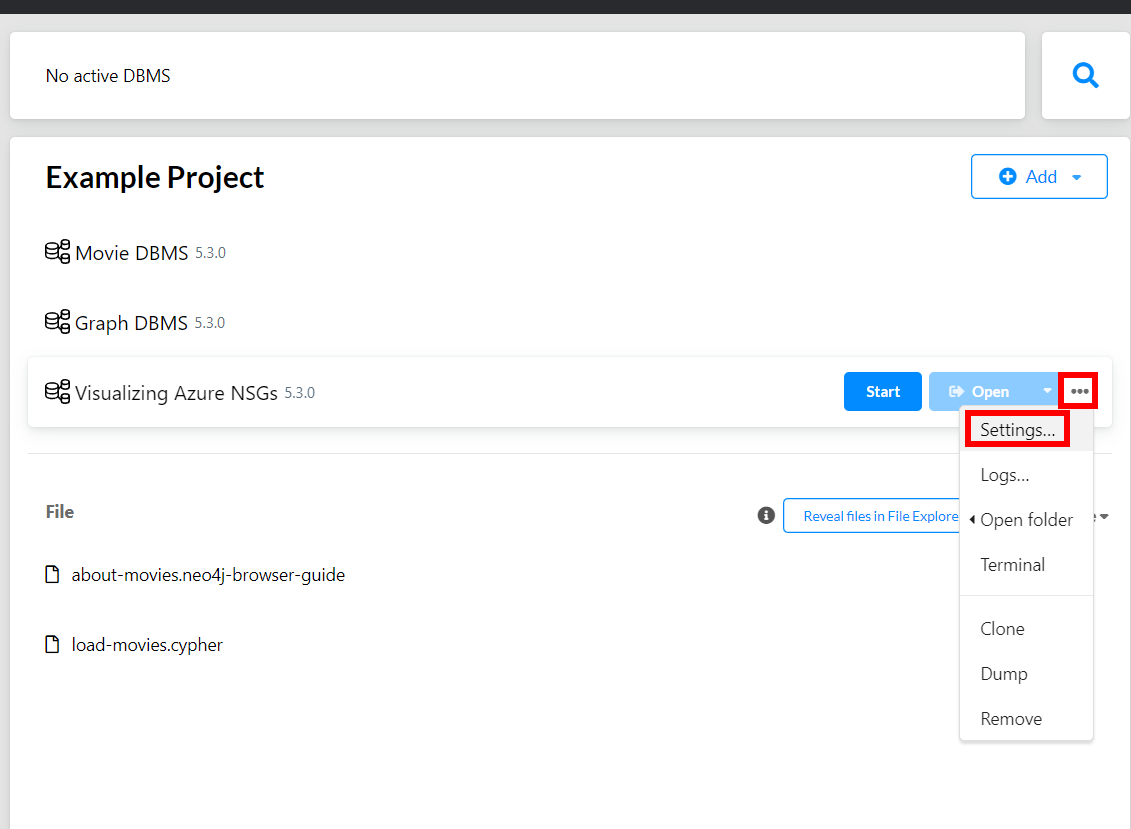
- With the database ready, let us make sure we can import CSV files. In some neo4j versions, the following step is needed. Navigate to your database. Afterward, click on the hamburger menu, then click settings.
- Now, search for
dbms.security.allow_csv_import_from_file_urls=trueand uncomment that line.
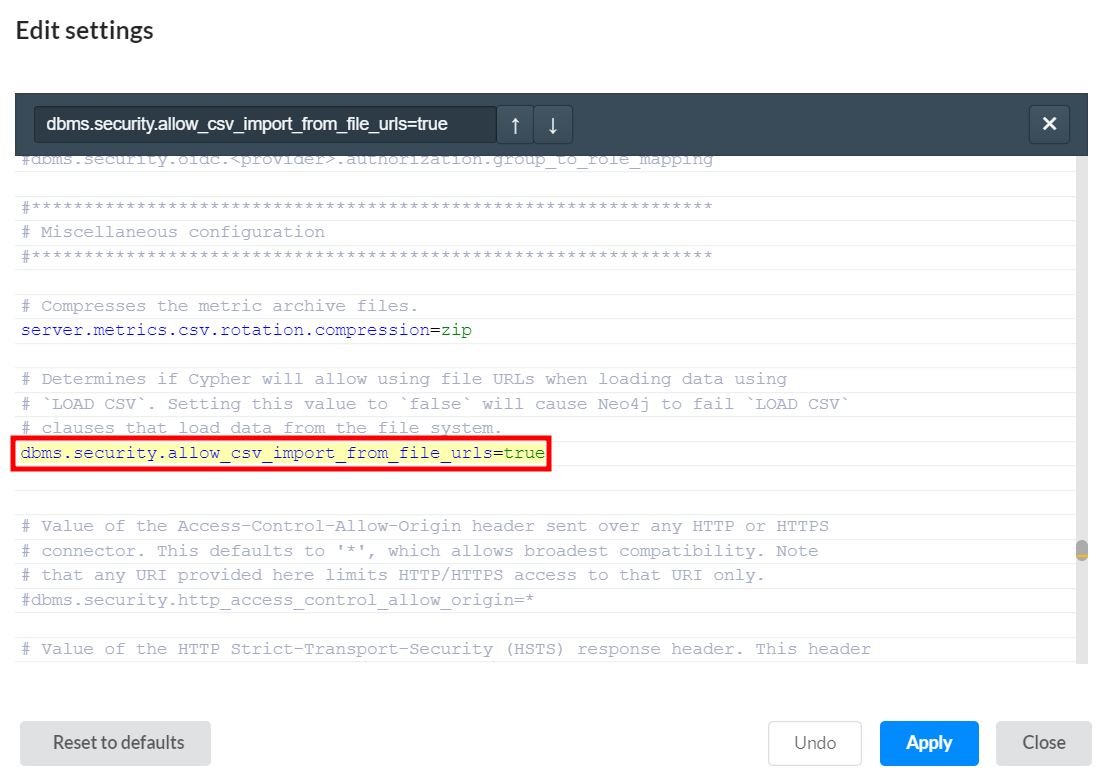
- Save and Restart your database. Finally, we import our dummy data into the database's import directory. On windows, neo4j is not authorised to read data from other filesystem locations. Thus, click on the database's hamburger menu, then click
open folder, thenimport.
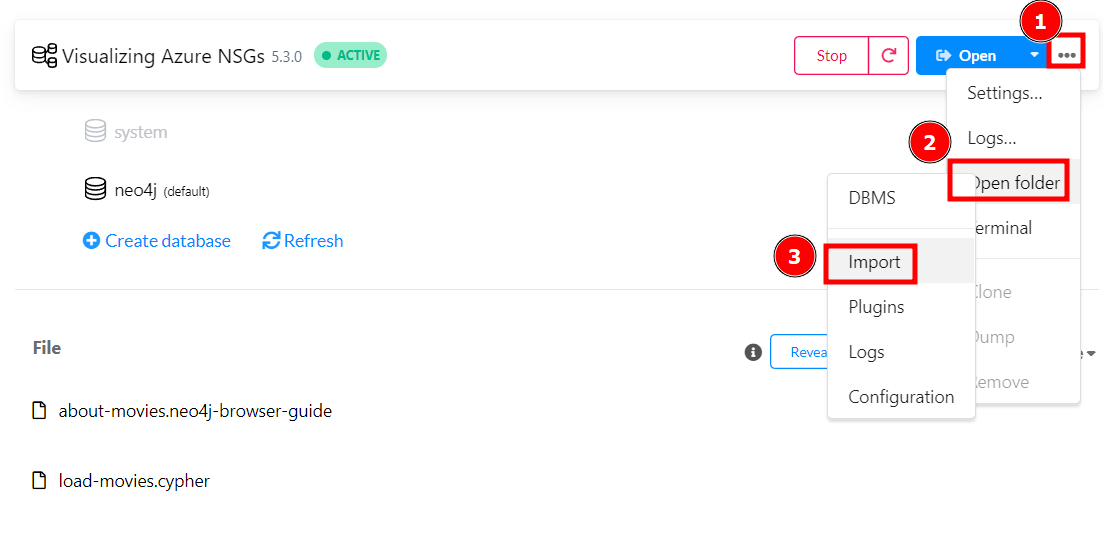
- Inside the newly created folder, let us create an
NSGs.csvfile and append the data we showcased earlier to it.

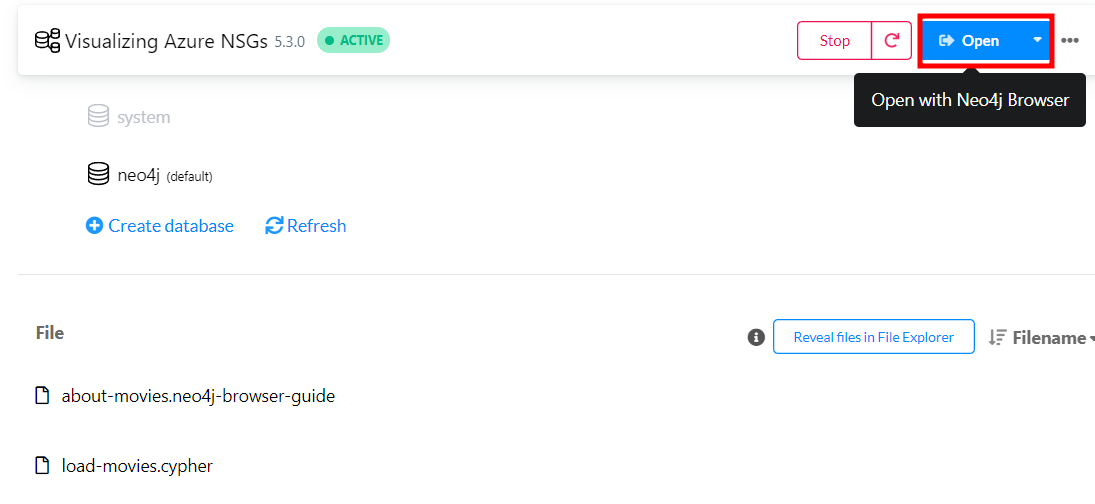
- With that, all that remains is to start a new neo4j browser by hovering the database and clicking the corresponding open a neo4j browser.
Building the Cypher Query
Cypher is neo4j's query language. It is a standardized language used to interact with graph databases. For more on Cypher, check out neo4j's documentation at: https://neo4j.com/docs/getting-started/current/cypher-intro/
First, to ensure our database is empty, and if not empty, we empty it ourselves using the following query. The following query matches every node in the database and detaches it from any relationship nodes (needed to delete a node) — otherwise neo4j complains the node has relationships). Afterwards, it deletes the nodes.
MATCH (n)
DETACH DELETE n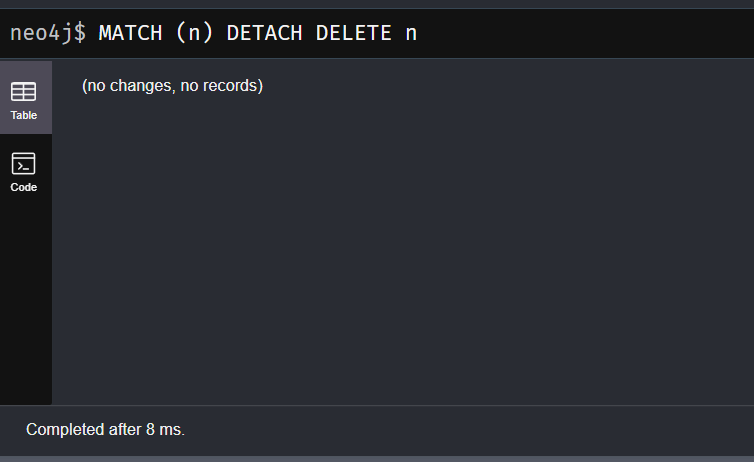
Now let's import out CSV file with headers and parse each row into a source node, a destination node, and a relationship node. We do it with the following query:
LOAD CSV WITH HEADERS FROM 'file:///NSGs.csv' AS line
MERGE (src: host { host:  line.Source } )
MERGE (dst: host { host:  line.Destination } )
MERGE (dst) - [:HAS_PORT] -> (port: port { portNum: line.Destination_Port } )
MERGE (src) - [ALLOW:ALLOW {ALLOW: "ALLOW"} ] -> (port)
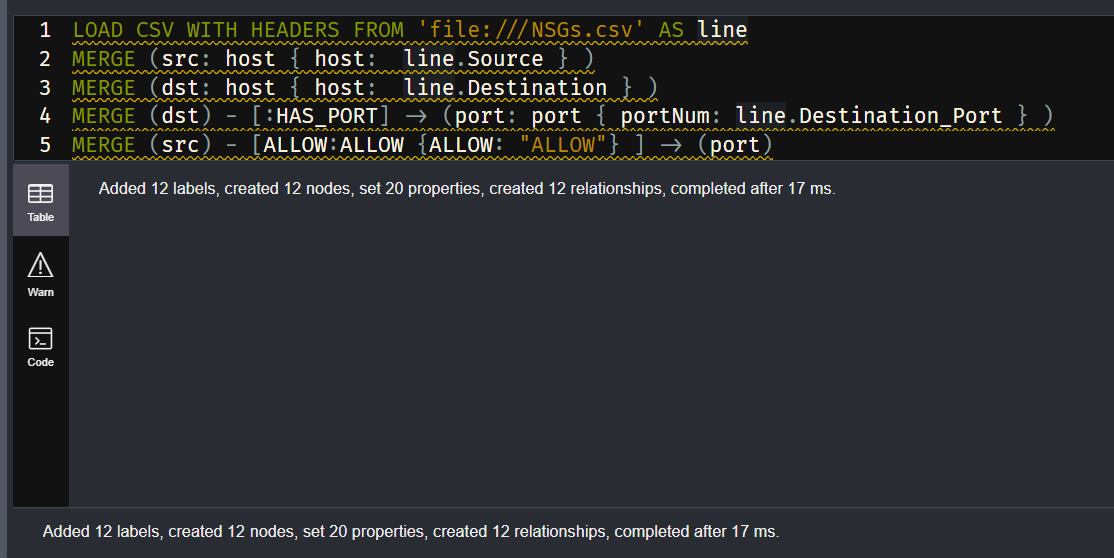
The merge command checks if the node exists in the graph; If not, it creates it; Otherwise, it does nothing. It is suitable for our use case as our rows include sources and destinations that are repeated multiple times. For example, a single subnet could be the source and destination for many other subnets. Hence, we don't want to create duplicates of that subnet; Instead, we create connections between the nodes we created earlier. For more on the merge command, check out: https://neo4j.com/docs/cypher-manual/current/clauses/merge/#merge-nodes
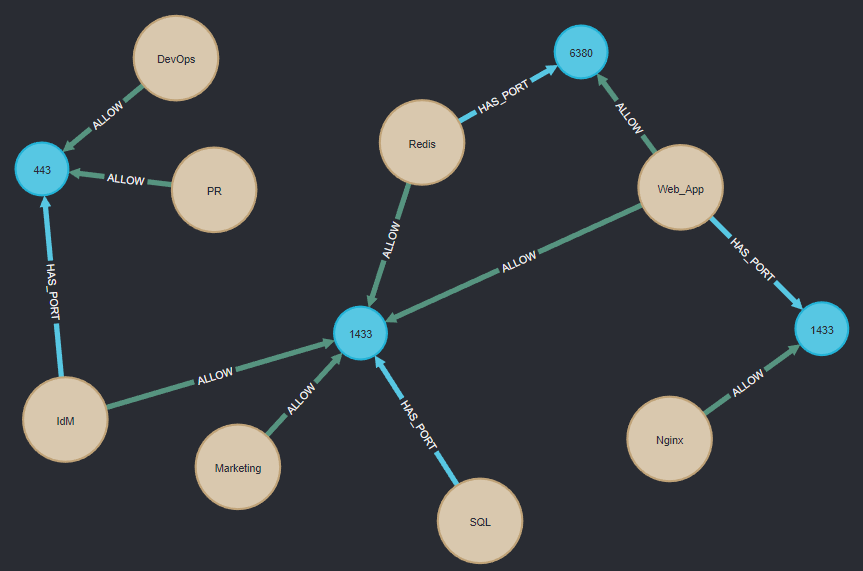
Finally, let's search for all nodes and visualize them using the following query:
WITH *
Match (n)
return n
Voila!
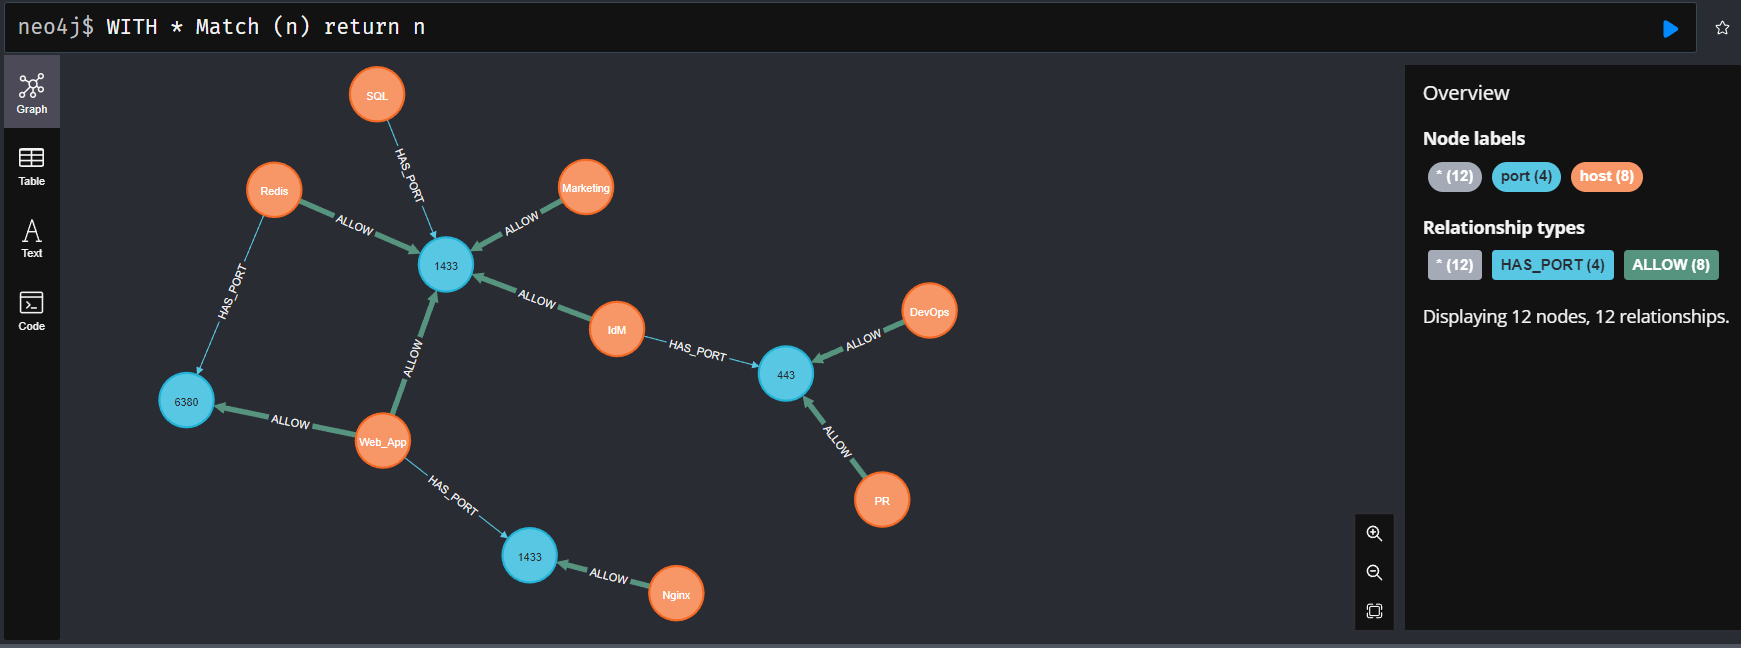
⚠️ If theHAS_PORTandALLOWrelationship attributes don't show for you, follow the next section.
Making it look good!
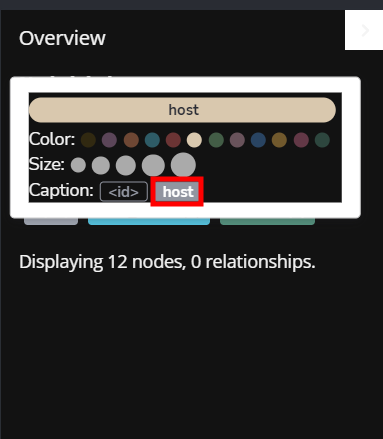
Let's style it a bit by increasing the node font size and changing the colors. While at it, set the nodes to show their attributes from the menu on the left. If the relationships or nodes don't have captions, select the node from the overview on the left side and click on the caption attribute.
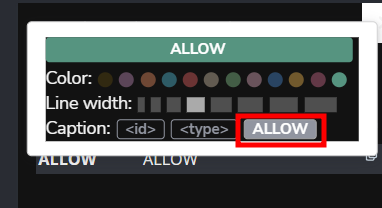
alternatively, for relationships:
and it looks like this
For some hardcore modification and font-size increase. Type :style in the console.
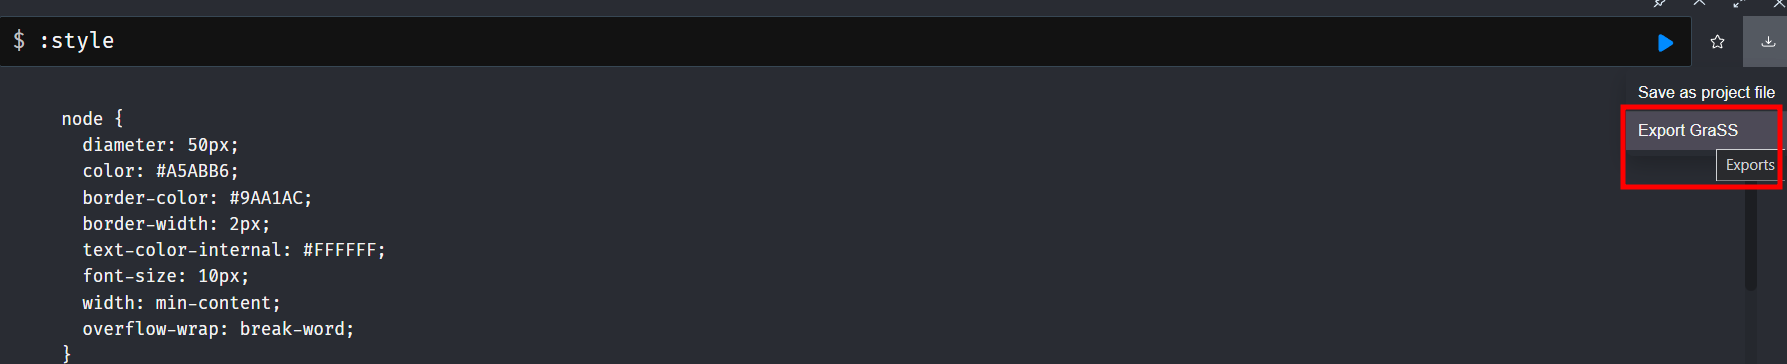
Click on the download button highlighted and open the grass file. Grass files are css files for neo4j but more obscure and with almost little to no documentation. Open the file and modify the font size. With the file updated, drag and drop it back to neo4j.
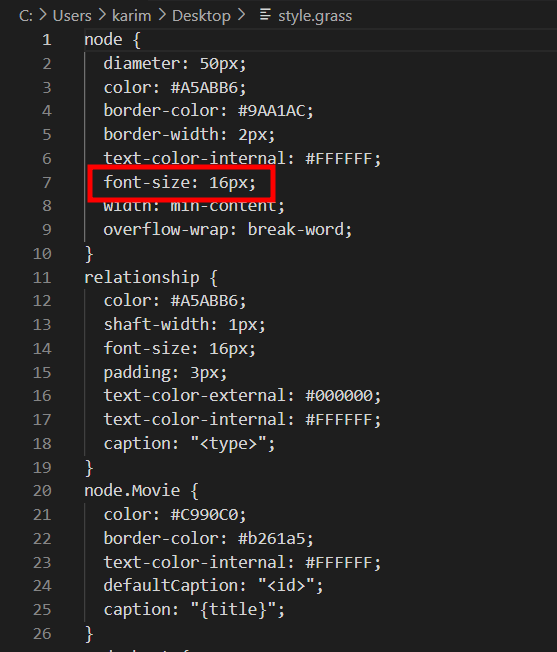
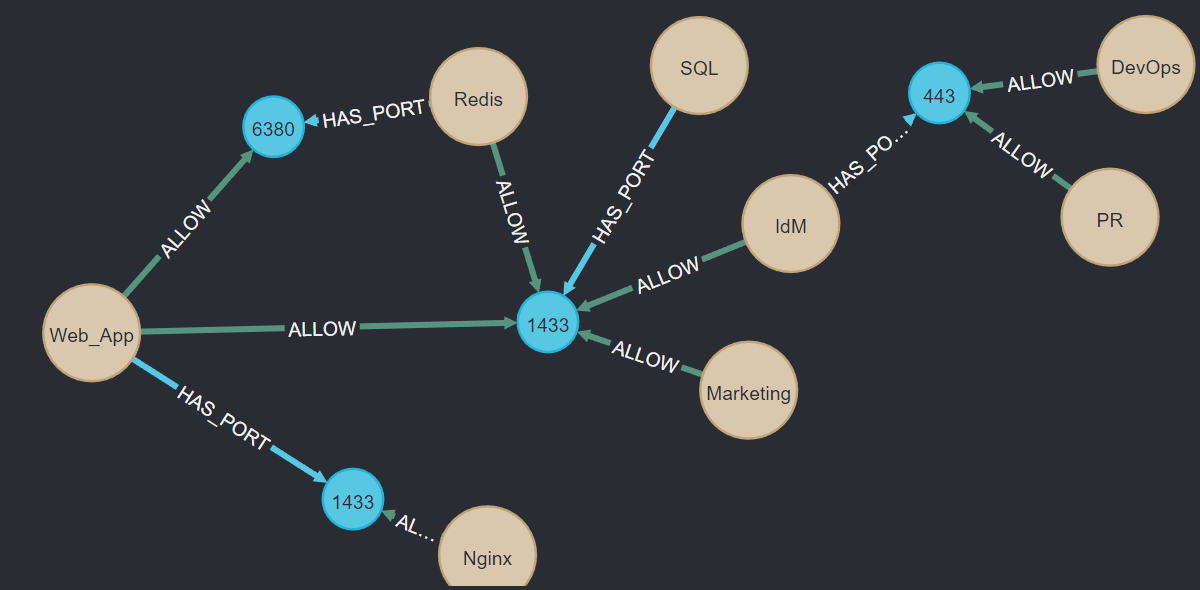
Drag and drop the grass file into neo4j and reuse the query to visualize the graph. Voila!
Limitations
Initially, I had long names for source and destination subnets, but the text would not wrap in the bubble. For the life of me I could not get it to work. Grass documentation is non-existent; If you can get the text to wrap in the bubble, let me know. For now, it's the one thing that bothers me a lot as I have had to keep the node text short; This is a critical issue as you cannot always reduce the subnet names to fit the text boxes without butchering all meaning in them. You play the hand you're dealt. Regardless, it is a nice exercise to get your neo4j muscles buffed up💪,and hopefully I got you interested in graph databases.