Setting Up iPhone 8 — iOS 16.2— for testing: palera1n, Sileo, Burp, Frida, Objection ,and more [2023]
![Setting Up iPhone 8 — iOS 16.2— for testing: palera1n, Sileo, Burp, Frida, Objection ,and more [2023]](/content/images/size/w960/2023/08/Screenshot-2023-01-12-at-11.07.21-1-1.png)
While practicing some iOS application testing recently, I thought it might be worthwhile to use a recent iOS version for future compatibility. Additionally, all the refurbished devices I could find on Amazon were iOS 15+. I could not find a lot of guides on setting up a recent iOS device for testing. So, I decided to set it up and make a step-by-step guide of my own.
What to expect
This blog post is a step-by-step guide to setting up a new iPhone for day-to-day testing. By the end of this blog post, you will have an iPhone set up with all the necessary tools, configurations, and tweaks to perform iOS application testing. By the end of this blog post, your setup will look as follows:
Host: Windows
Hypervisor: VMWare
Guest VM: Parrot VM
Phone: iPhone 8 iOS 16.2
At the time of writing this post, palera1n supports iPhone SE and iPhone6 up to iPhone X. For a full list of supported devices, refer to: https://www.idownloadblog.com/2023/05/18/palera1n-ios-16-5-compatible/.
Installed packages:
- palera1n
- Sileo: Successor to Cydia, A modern Tweak Store
- Frida: Dynamic Instrumentation toolkit: hook apps, bypass detections, etc.
- Objection: Multi-purpose wrapper around Frida
- appinst: CLI tool to Install IPA files
- ldid: Sign applications
- AppSync Unified: A tweak that allows users to install unsigned IPA app packages
Additionally,
- iproxy: SSH Over USB
- BurpSuite
Jailbreaking iOS 15.6 (works for iOS 16.2)
As of the time of writing this blog post, I could not use palera1n to jailbreak inside a VM. So, for our purposes, we will be using a Linux host — just for the jailbreaking procedure. Afterward, you are free to test on your favorite OS of choice.
⚠️The Palera1n jailbreak is semi-tethered; This means if you restart your iPhone, your tweaks data will persist. However, you will need to re-exploit the Phone to use them.
To jailbreak your iPhone 8, follow the steps below:
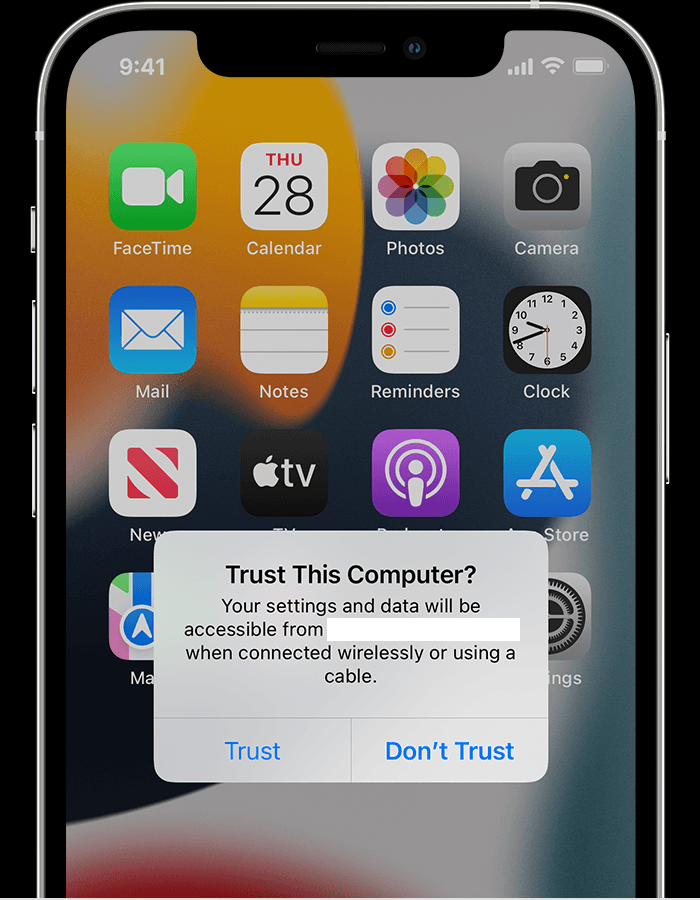
- Connect your iPhone to the computer, and trust the computer from inside the iPhone trust dialog.
2. Put your iPhone into DFU mode. You may need to check how to do that for your specific iPhone. But, for iPhone 8, I found the following video to be easy to replicate: How to Enter DFU Mode on iPhone - All Series [Full Guide 2021] - YouTube.
If the previous video was not clear, I found the following blog post to be helpful. How to Get into DFU Mode on iPhone 8/8 Plus/X - EaseUS
While DFU-ing the phone, If the Apple logo appears, the Side button was held down for too long.
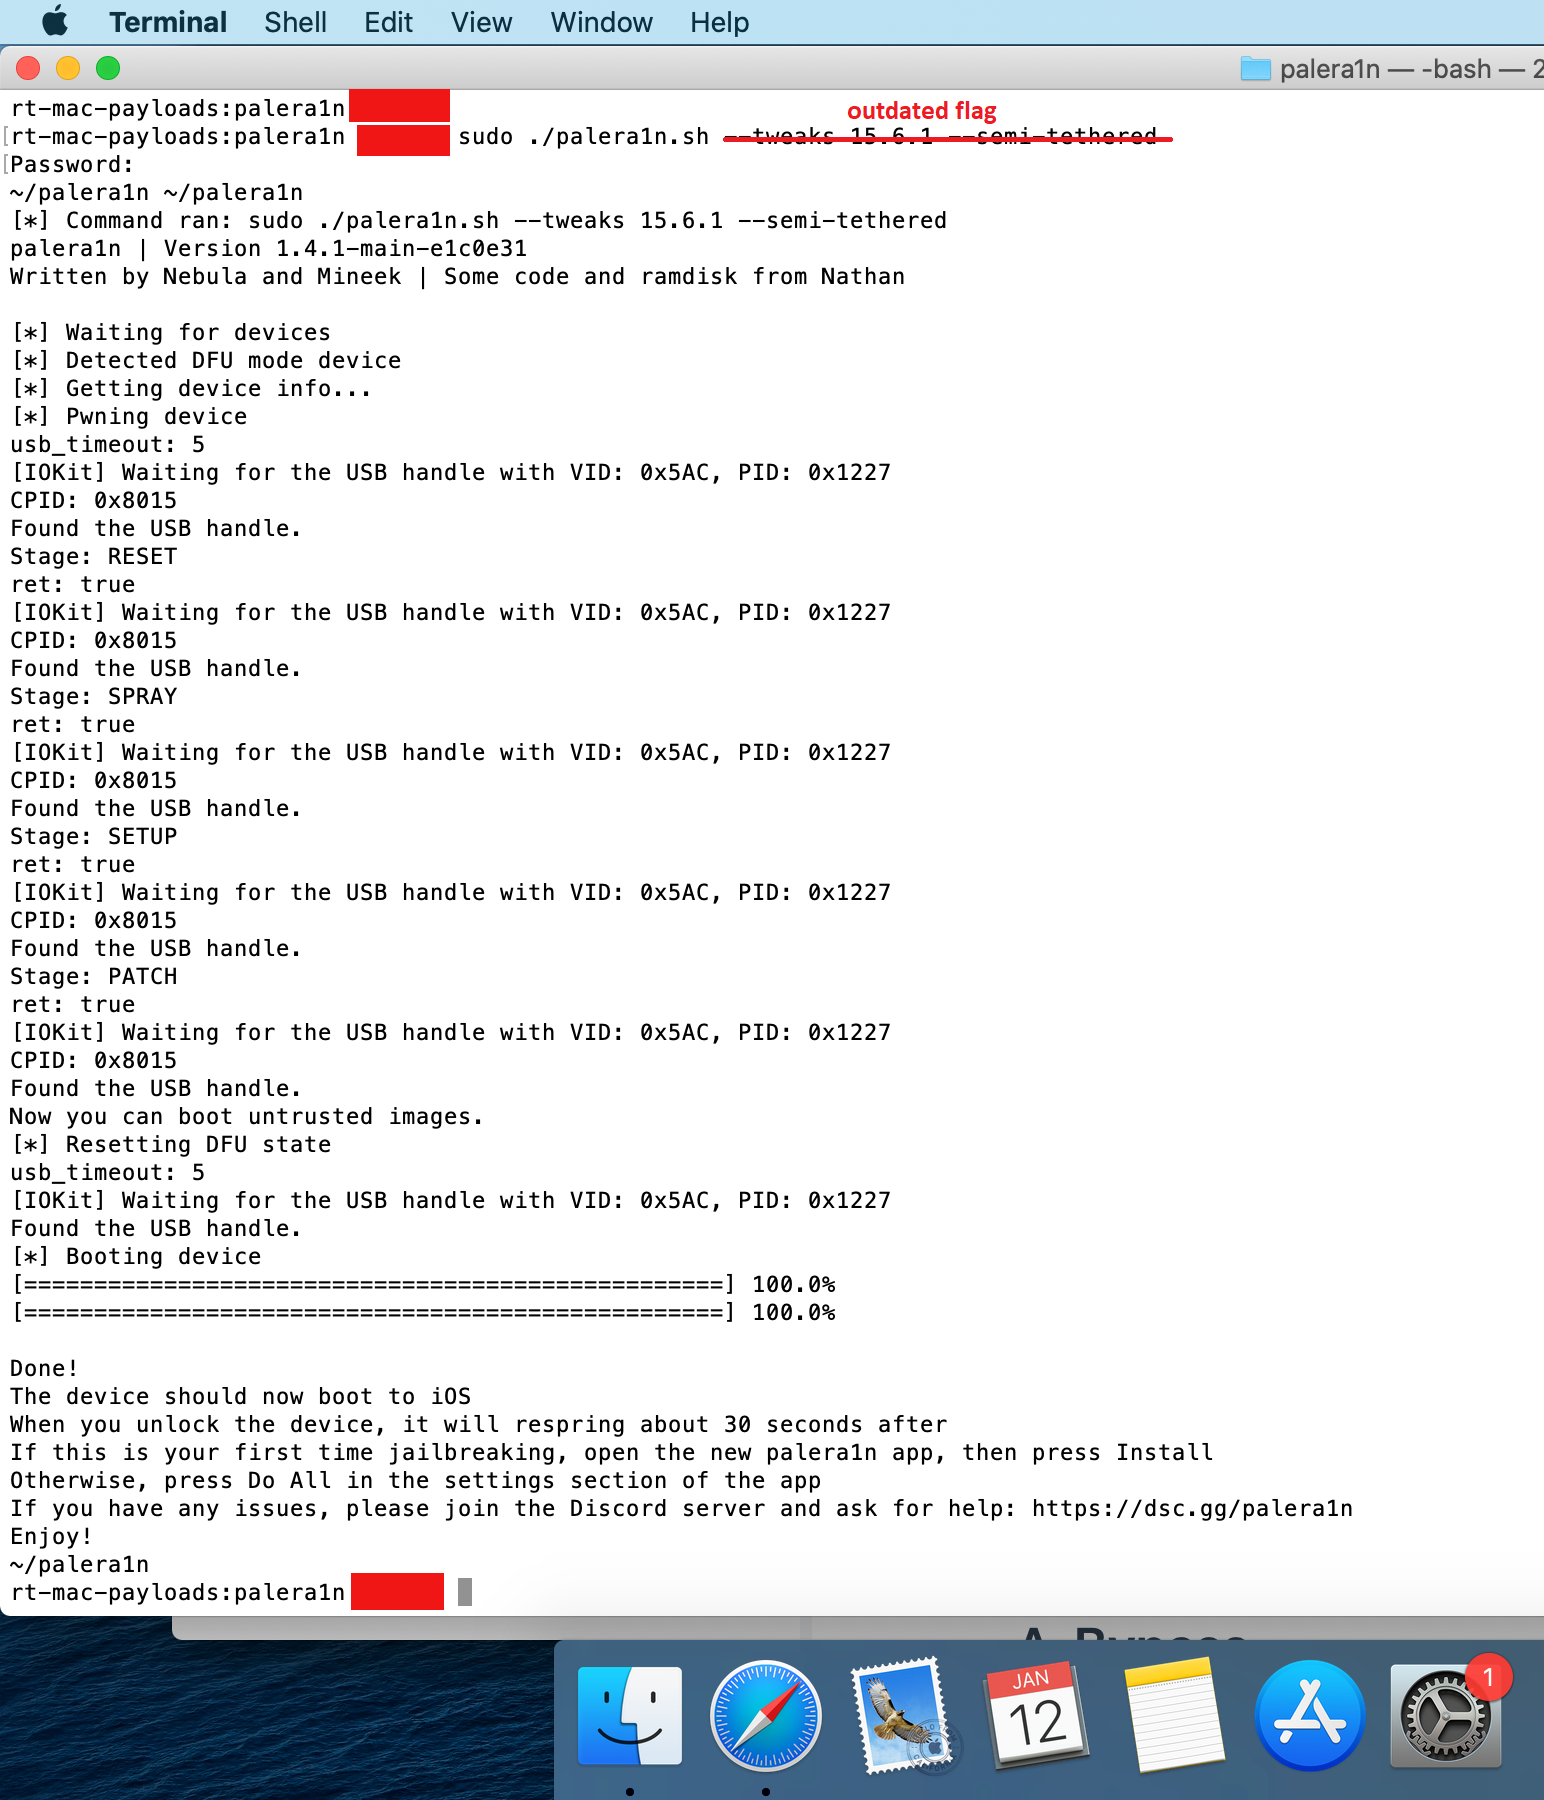
3. Once the phone is in DFU mode, follow the guide below to jailbreak the iPhone: https://ios.cfw.guide/installing-palera1n/?tab=linux#installing-the-jailbreak
Setting Up iproxy inside a VMWare VM
iproxy allows you to forward localhost ports to the device allows SSH over USB on jailbroken devices, or allowing access the lockdown daemon (and then to all of the file access, sync, notification and backup services running on the device).
- Using VMWare, Set up a Parrot OS VM.
✔️ If VMWare's USB settings are grayed out, navigate to your VM's folder (c:\users\<username>\Virtual Machines\<VM_Name>), open the <VM_Name>.vmx file. Ensure your VMware VM config file has the usb.restrictions value set to true.
usb.restrictions.defaultAllow = "TRUE"
- fire up your VM and install guest additions tools.
✔️ If you have an issue copy-pasting into the guest VM, the following command fixed the issue for me.
sudo vmware-user-suid-wrapper
Ensure the iPhone is connected to your Linux guest VM from VMWare's Removable devices settings. Double check the iPhone trusts the Linux VM.
Inside your Linux guest, install iproxy
sudo apt install libusbmuxd-tools
SSH over USB is more stable and reliable than normal SSH logins. From my experience, remote SSHing proved to be very slow.
- Start iproxy to forward local port 2222 to 22.
iproxy 2222 22
ssh [email protected] -p 2222
The default creds for the ssh server are mobile, and the password is set upon Jailbreaking the device (you will be prompted to set a sudo password, after a successful Jailbreak with palera1n).
Installing IPA Applications
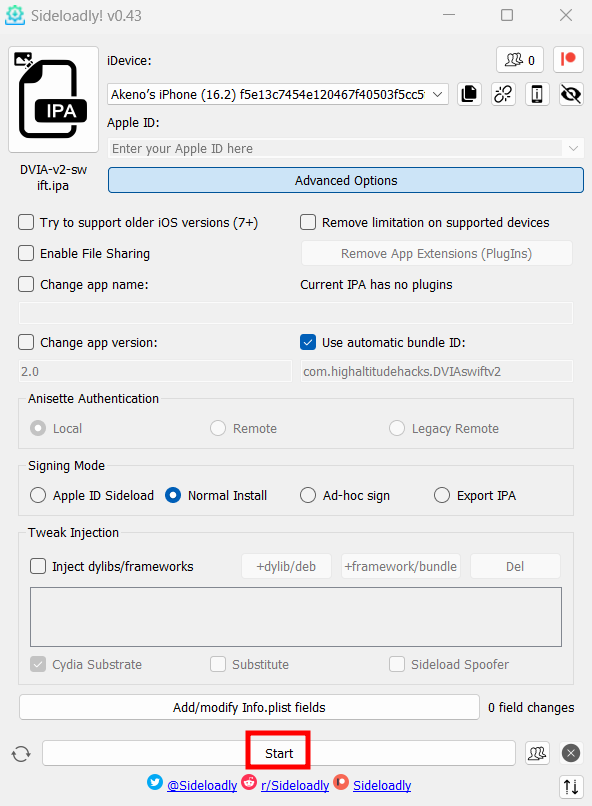
Installing unsigned IPA applications using SideLoadly
The simpler way to install unsigned IPA applications with an easy to use GUI.
- Install Sideloadly on your host from https://sideloadly.io/.
- After connecting your iPhone via USB, drag and drop the application to Sideloadly.
- Click on
Advanced Options, and choose the signing mode.
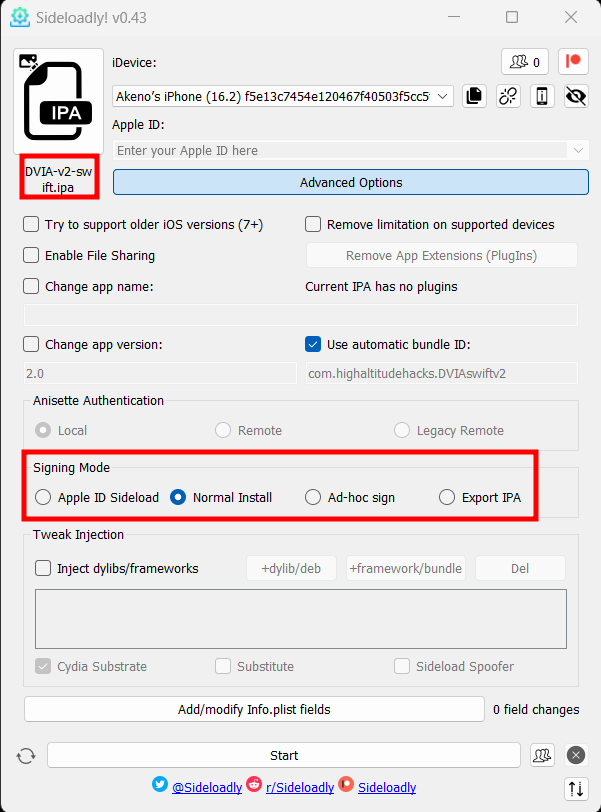
- Click start to install the app
Installing appinst and AppSync Unified from Sileo
Sileo is a package manager similar to apt; Sileo has a sources list that is used to install packages. To install AppSync Unified and appinst from Sileo, follow the steps below:
-
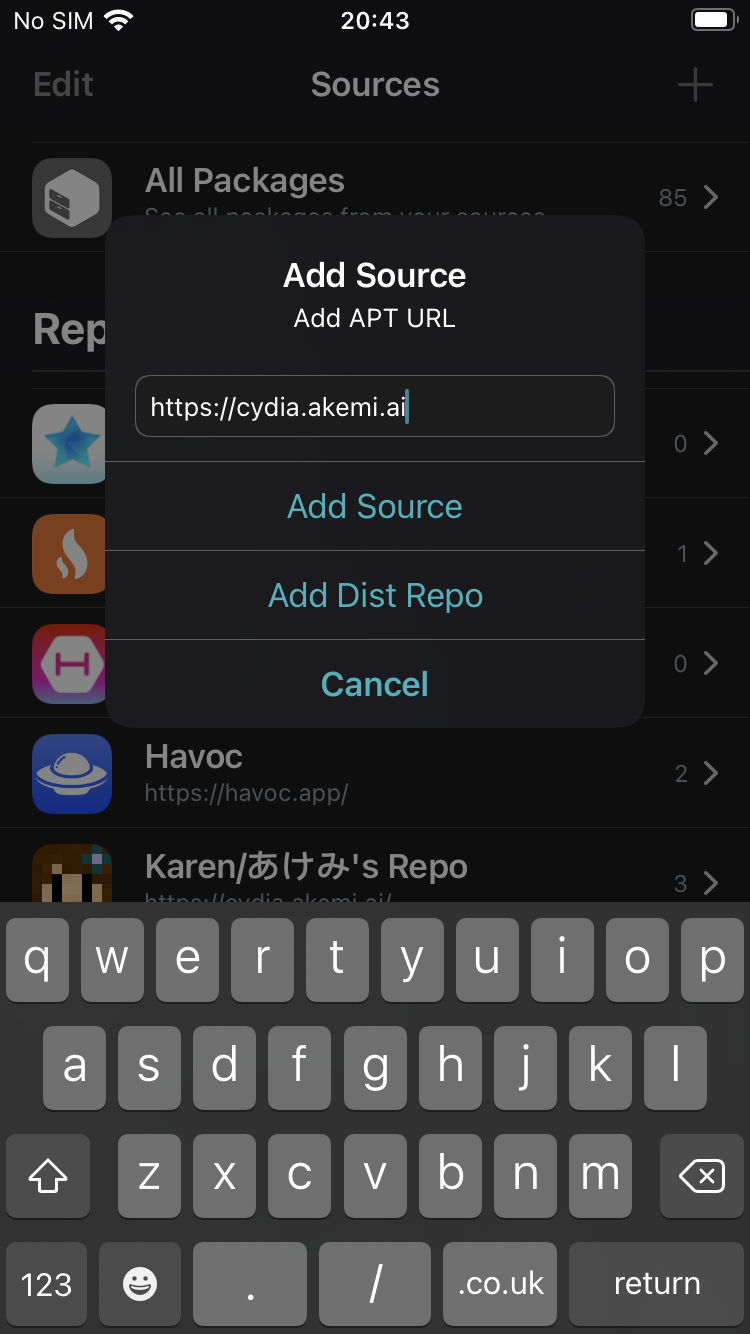
Inside the Sileo application, click Sources then the + button.
-
Afterward, Add the
https://cydia.akemi.ai/repository to Sileo's source list
-
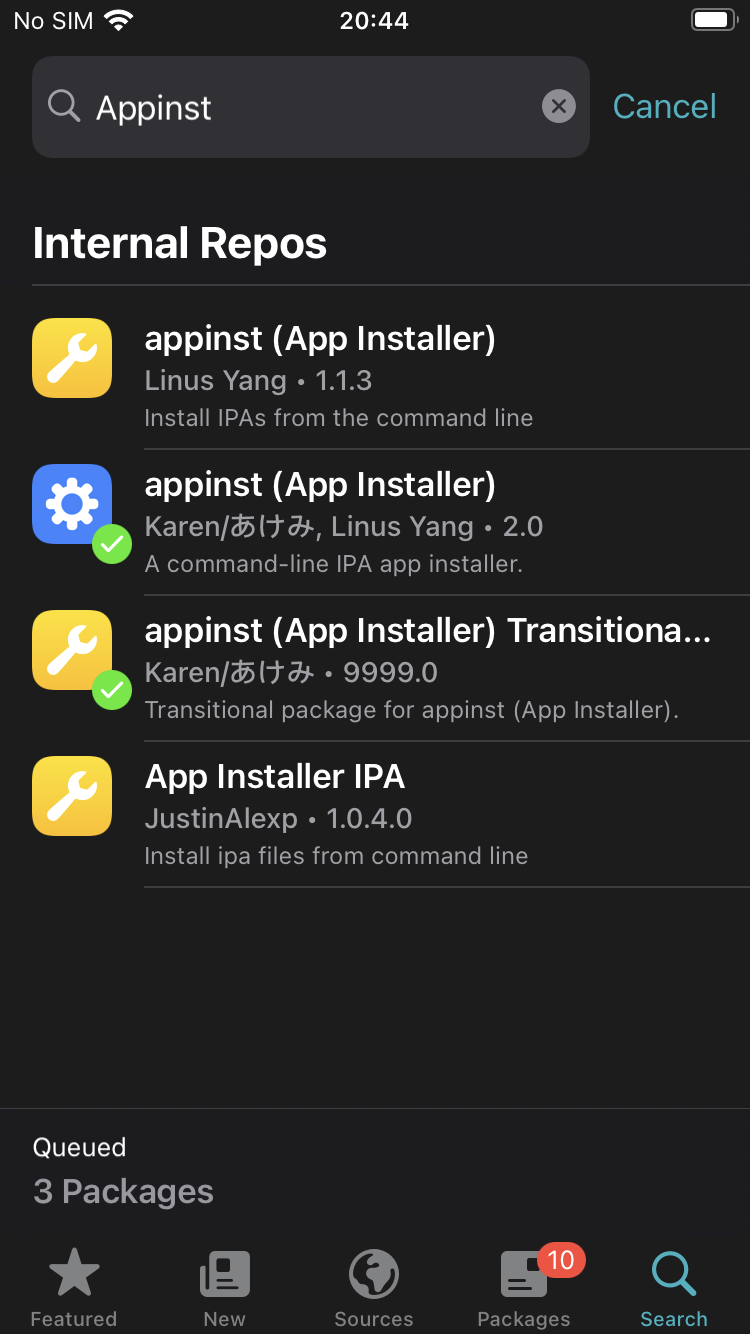
Once the
akemirepo. has been added to your sources, install the appinst package
Install non-signed apps using appinst
Although the AppSync Unified tweak enables you to install self-signed applications, Some applications are not signed, such as the Damn Vulnerable iOS App (DVIA)
- SSH into your iPhone and download the IPA file into /var/root
ssh [email protected] -p 2222
sudo su
sudo apt-get install wget ldid
cd /var/root
wget https://github.com/prateek147/DVIA-v2/raw/master/DVIA-v2-swift.ipa
Note that if you install the DVIA-v2-swift.ipa file without signing the binary, The application will crash on launch as the application is not signed at all. Hence, AppSync Unified is useless.
- Install the application with appinst
appinst /var/root/DVIA-v2-swift.ipa
- find the bundle Id for the installed application and sign the binary with ldid
cd /var/containers/Bundle/application

# Identify the Bundle Id for the app. In my case, the app name is dvia
ls | grep diva -i -B 2

# The bundle Id is F6CB934B-C989-4FB3-BD08-58F339BEF448
cd F6CB934B-C989-4FB3-BD08-58F339BEF448

# Sign the application
ldid -S DVIA-v2.app
Install frida and objection
- Download frida-server
-
For rootless Jailbreaks, Download
frida_16.1.3_iphoneos-universal.debfrom https://github.com/miticollo/miticollo.github.io/tree/main/repos/my/debs/frida. -
Alternatively, For rooted Jailbreaks, download the binary from Releases · frida/frida (github.com)
For more on Frida and rootless Jailbreaks, refer to iOS rootless jailbreak package · Issue #2288 · frida/frida · GitHub, and Build frida-server binary for rootless Jailbroken devices from scratch.
-
- Transfer the application to your iPhone with scp, and sudo to root
- Inside your iPhone, install the package with
dpkg -i frida_16.0.8_iphoneos-arm.deb - Inside your iPhone, Start Frida Server
frida-server -D
- Pipx is a virtualenv packager. Use pipx to install frida-tools inside your Linux VM.
pip install pipx
pipx install frida-tools
pipx install objection
- List running processes using Frida
frida-ps -iaU
- Identify installed devices on the phone using
ideviceinstaller
apt install ideviceinstaller
ideviceinstaller -l
- Explore the application with objection
objection --gadget DVIA-v2 explore
Configure Burp Suite and firewall rules to intercept traffic
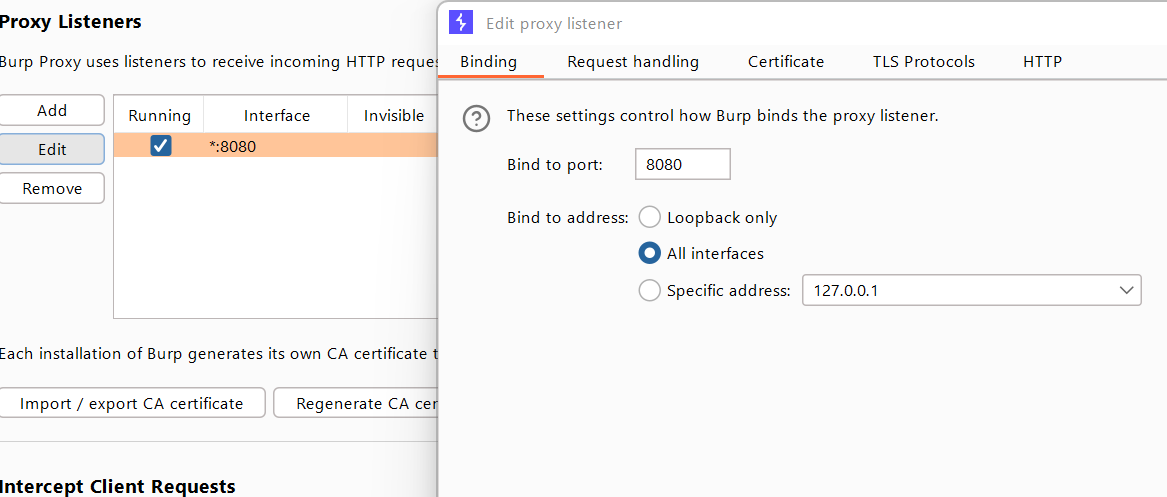
Setting up Burp to proxy your traffic is pretty straightforward. We assume that both your iOS device and host computer are connected to a Wi-Fi network that permits client-to-client traffic.
- Inside your host machine, configure Burp to listen on all hosts.
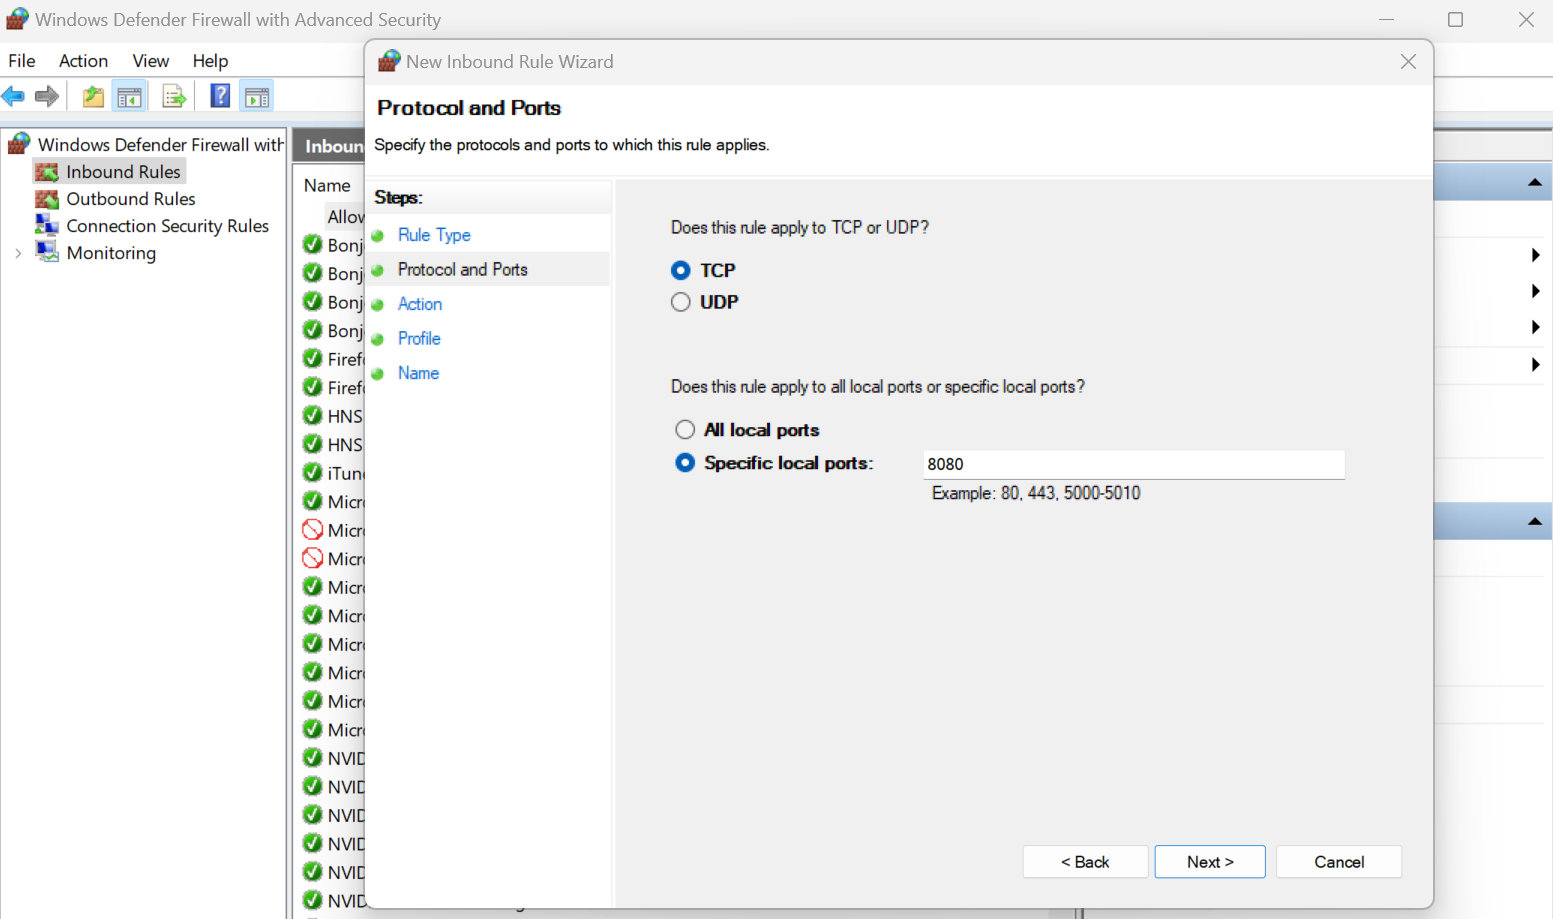
2. Configure your windows firewall rules to allow in-bound traffic for port 8080. However, we will limit the firewall rule to remote IPs within the 192.168.114.0/24 network subnet — my local home network home subnet. Additionally, for another layer of security, configure the firewall rules only allow traffic from private network profiles. If you don't know what private network profiles, check out https://learn.microsoft.com/en-us/previous-versions/windows/desktop/ics/windows-firewall-profiles . Finally, mark your current network as private.
3. Click on the windows start menu and search for Windows Defender Firewall with Advanced Security.
4. Click on the inbound rules button and add a new rule
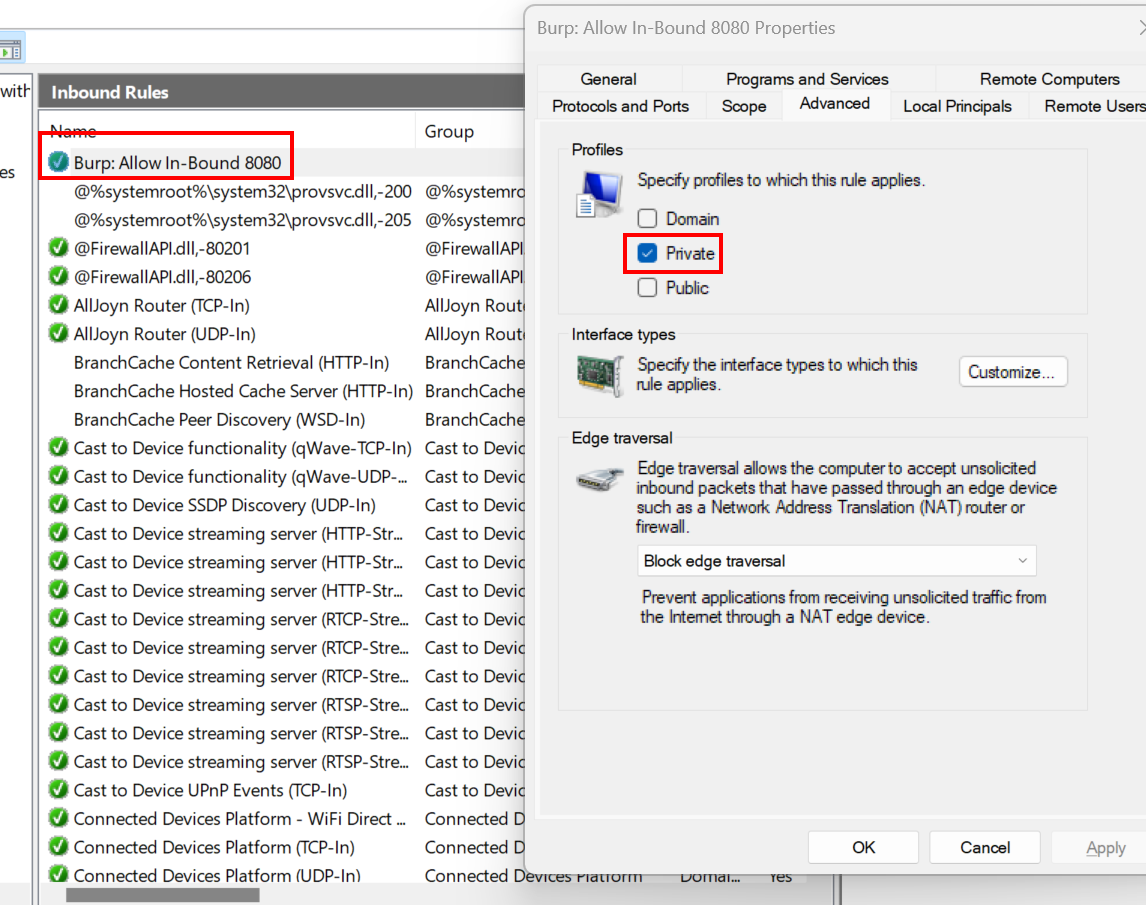
5. Configure the rule to permit traffic from private network profiles
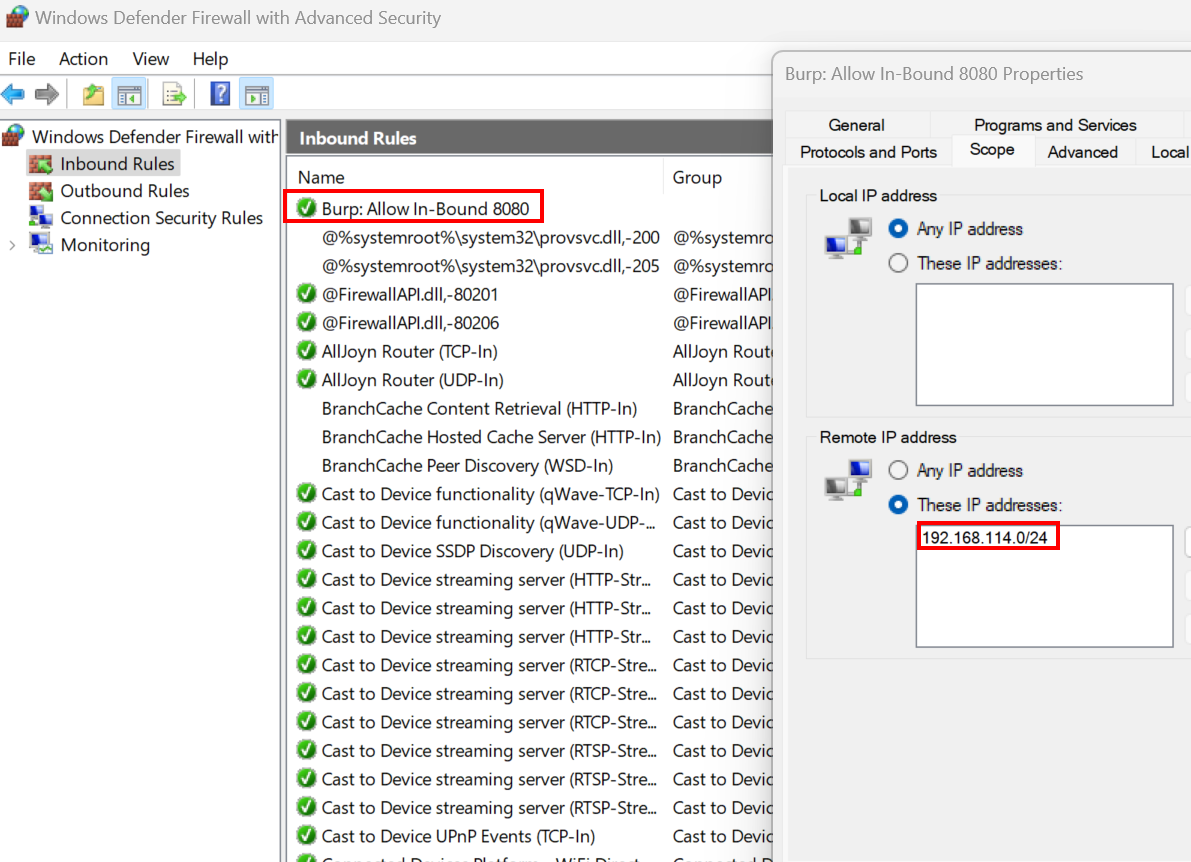
- Configure the rule to allow remote access from the
192.168.114.0/24subnet — my home network subnet.
7. Change the current network profile of your wifi network to private
# Get connected network name
Get-NetConnectionProfile


Set-NetConnectionProfile -Name <network_name> -NetworkCategory Private
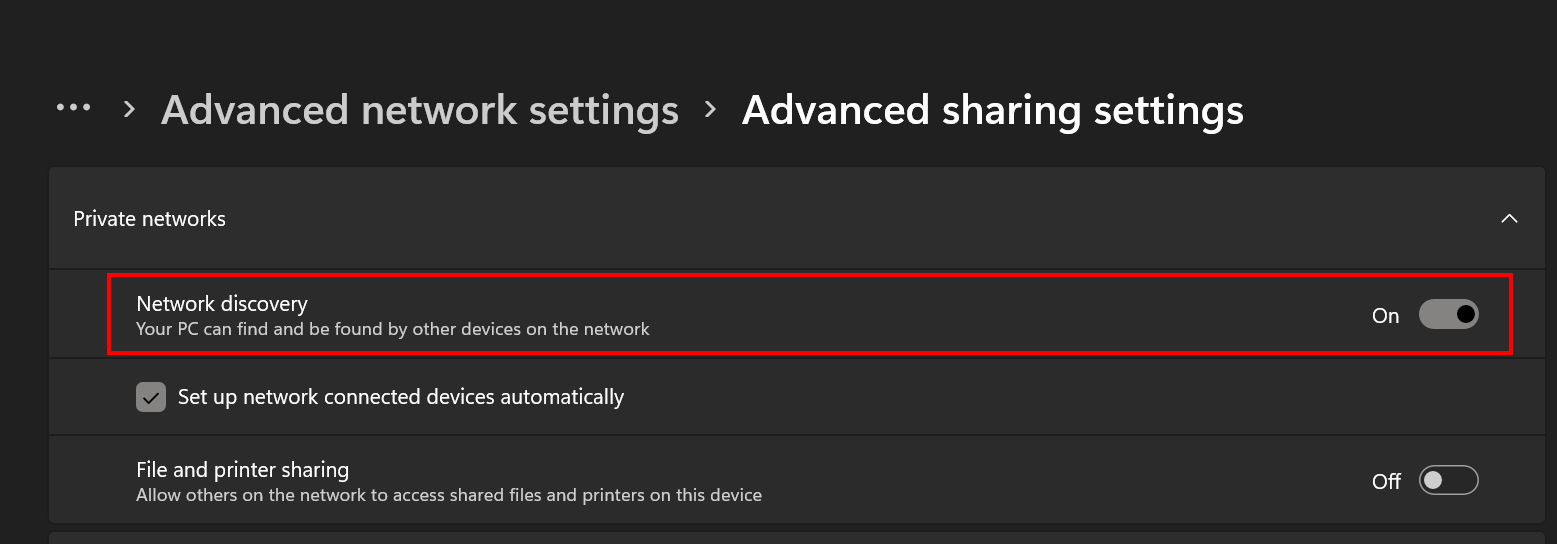
- Ensure that network discovery is enabled in Advanced sharing settings; Otherwise, DNS won't resolve while intercepting traffic.
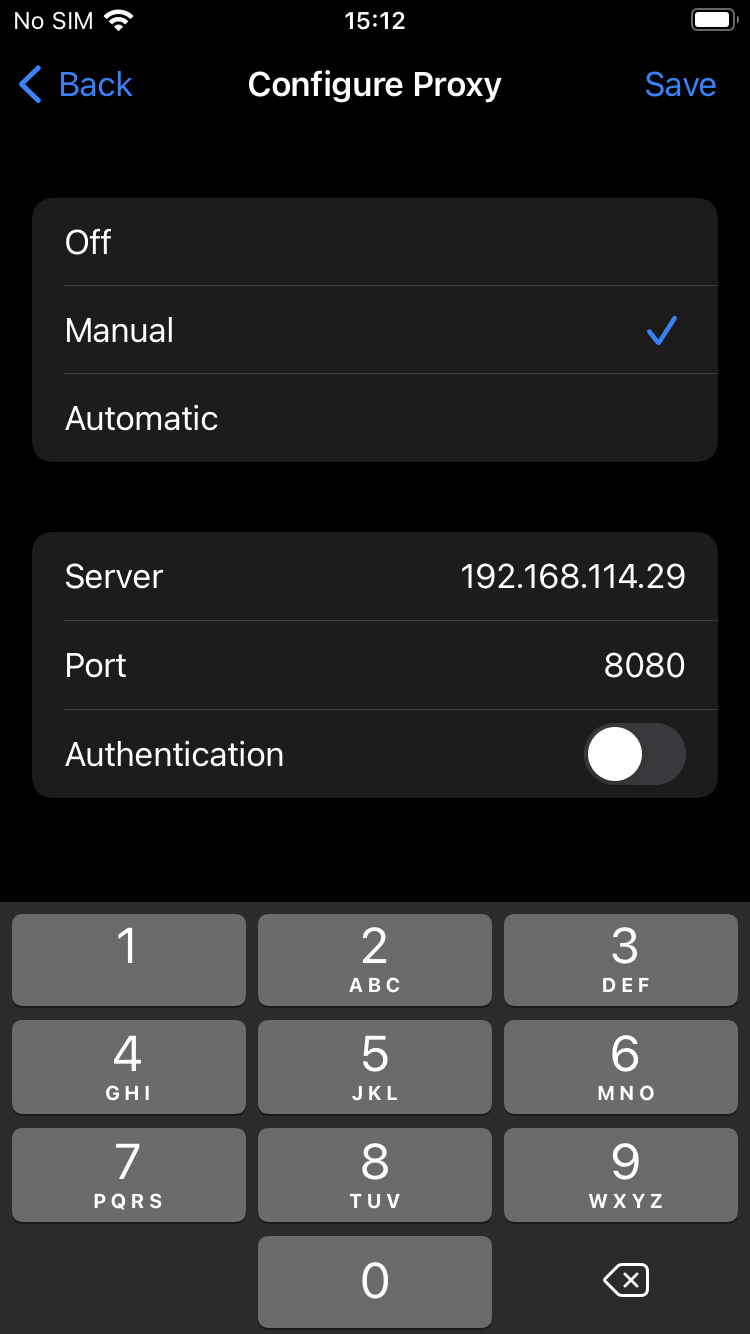
- Configure your windows host as the iPhone's proxy in Settings --> Wifi-> Click the network -->Proxy
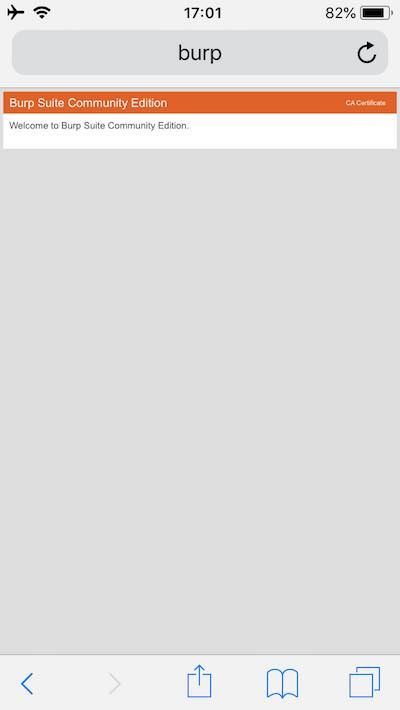
- On your iPhone, navigate to
http://burpand click on the CA certificate button to download the certificate.
- Access Setting --> VPN & Device Management --> Profile Downloaded and Install it (you will be required to input your pin code).
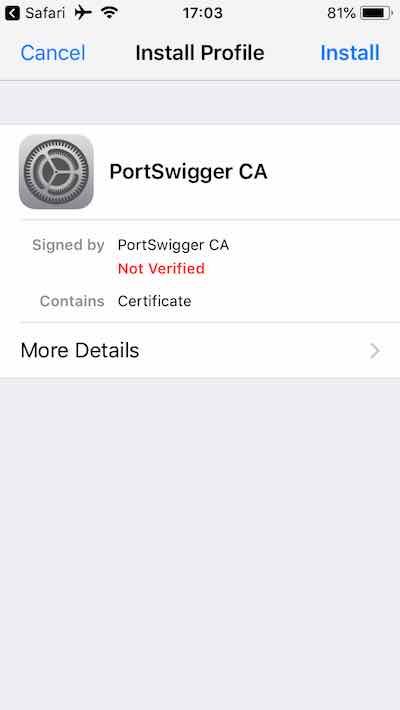
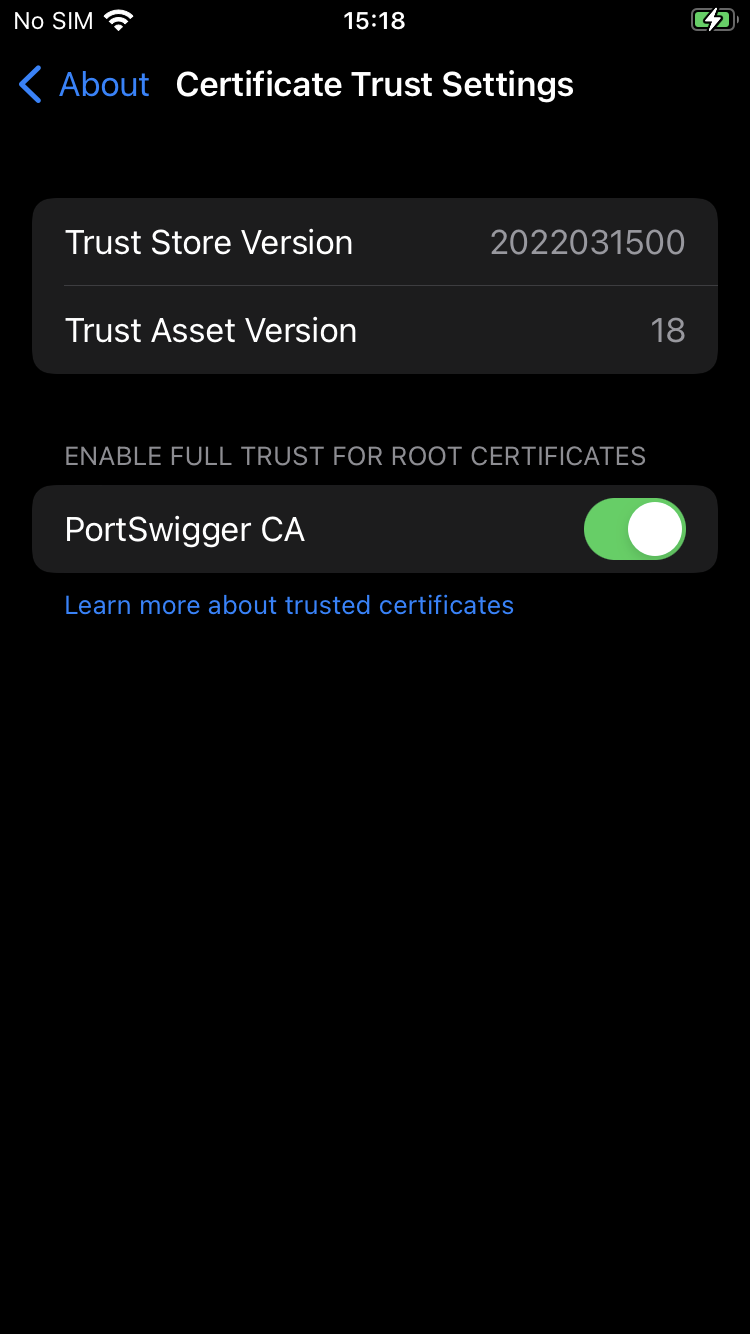
- Access Settings -->General --> About --> Certificate Trust Settings and enable PortSwigger CA.
Caveats
Tweaks that broke my device
💀 SSL Kill Switch 2 killed my iPhone when I tried installing it. For now, I am using frida scripts to bypass SSL pinning. If you manage to get SSL Kill Switch 2 to work, let me know.
⚠️ I recommend installing the minimum amount of tweaks you can get away with and building up your tweak collection on per need basis. During my tests, I had a bunch of tweaks that broke my iPhone's ability to download AppStore applications. The applications would not work; I had to: uninstall all tweaks, reboot my iPhone and Jailbreak it once more to fix the issue.
Setting a passcode rebooted the device
☠️💀 After Jailbreaking the device, I set up a passcode, and the device rebooted. I would avoid setting a passcode until palera1n devs fix the issue in a future release.
Recommended Sileo Sources
Add to Sileo Repos' the following as sources:
http://apt.thebigboss.org/repofiles/cydia/
https://cydia.ichitaso.com
http://repo.co.kr
https://ryleyangus.com/repo
Restart the SpringBoard from SSH
In some cases, you may want to restart the SpringBoard manually — without using Sileo's GUI
ssh [email protected]

sudo su

killall -9 SpringBoard

# Not always needed; Test the previous command first
reboot